Crafting Shadows and Drama
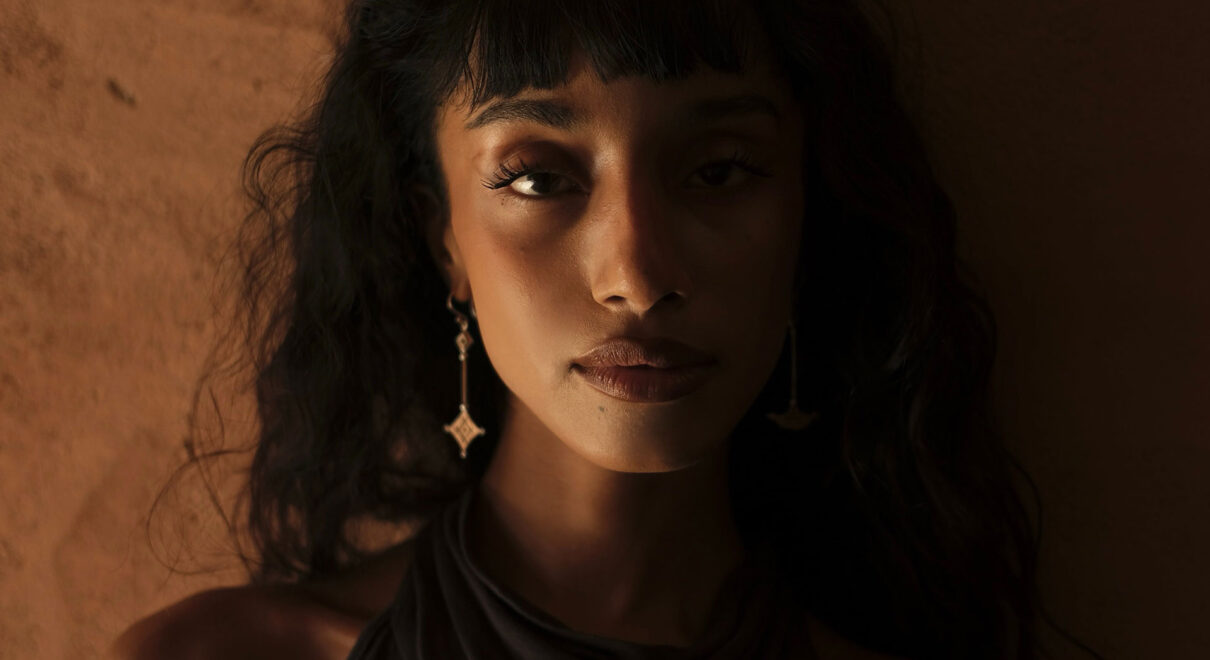
In the realm of photography, the dark and moody aesthetic has carved out its niche, captivating viewers with its enigmatic and dramatic allure. This style, characterised by intense shadows, rich contrasts, and an immersive atmosphere, demands meticulous attention to lighting. This blog post delves into the professional world of dark moody photography, providing a detailed guide on crafting the perfect lighting setup to accentuate the mystique and beauty of culinary subjects.
The Art of Dark and Moody Photography
Dark and moody photography is more than a style; it’s an art form that plays on the viewer’s senses. It evokes emotions, tells a story, and transforms the ordinary into the extraordinary. The essence of this photography lies in its ability to highlight the textures and intricate details of through a masterful interplay of light and shadow.
Essential Lighting Techniques for Dark Moody Photography
Selecting the Ideal Light Source
Natural Light: Utilising natural light can be effective, especially when moderated through curtains or diffusers to achieve the desired softness and angle.
Artificial Light: For more control, artificial light sources like softboxes or LED panels offer consistency and precision. They allow for adjustments in brightness and positioning to craft the perfect moody atmosphere.
Direction of Light
Side lighting is often the go-to choice for this genre. It naturally creates depth and dimension by casting shadows that accentuate the textures of the, adding a dramatic effect.
Manipulating Shadows
Controlling shadows is crucial. Use reflectors or black cards to deepen shadows or soften them. The goal is to create a balance that enhances the mood without losing critical details in the darkness.
Diffusion Techniques
Diffusing your light source is imperative to soften harsh highlights and create a subtle gradation of tones. Materials like frosted glass, softbox diffusers, or even sheer fabric can be employed to achieve this effect.
Background and Props
The choice of background and props plays a significant role. Opt for dark, matte surfaces that absorb light, aiding in creating an intimate and focused setting.
Camera Settings
- Aperture: f/4 to f/5.6. A wider aperture (lower f-number) helps focus on the object while gently blurring the background, adding depth and emphasis on the subject.
- Shutter Speed: 1/60th to 1/125th of a second. This is usually sufficient to capture sharp images without motion blur, especially if you’re shooting handheld. If using a tripod, you can opt for slower shutter speeds.
- ISO: Keep it as low as possible, ideally between 100 and 400, to minimize noise. In a controlled lighting setup, you should be able to keep the ISO low.
- White Balance: Depending on the mood you want to convey and the lighting conditions, adjust the white balance. A cooler white balance can enhance the moodiness.
- Manual Focus: Consider using manual focus for greater control.
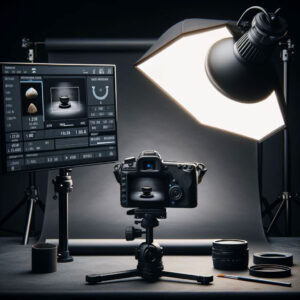
Lighting Setup
- Main Light Source: Use a single, large light source like a softbox positioned to the side of the object. This will create soft shadows and highlights, providing depth and texture. Place it at a 45-degree angle to the object for optimal shadow and highlight balance.
- Diffusers: If the shadows are too harsh, use a diffuser like a white scrim or a piece of frosted shower curtain to soften the light.
- Reflectors and Black Cards: Use reflectors to gently fill in the darkest shadows if needed. Conversely, use black cards to deepen shadows and add contrast for a more dramatic effect.
- Background and Surface: Opt for dark, matte surfaces and backgrounds to absorb light and enhance the moody effect. Textured surfaces like slate, dark wood, or matte painted canvas can work well.
Example Setup
- Camera set on a tripod, with an aperture of f/4.5, a shutter speed of 1/80th, ISO 200, and a custom white balance set to slightly cool.
- A softbox placed to the left of the setup, slightly above the object angled downwards.
- A diffuser between the softbox and the object to soften the light.
- A black card on the opposite side of the light source to enhance shadows on the right side of the object.
- The object placed on a dark, matte surface with a simple dark backdrop.
Remember, these settings are just a starting point. Dark and moody photography is as much about creative vision as it is about technical settings. Experiment with different arrangements and settings to find what best suits the mood you’re trying to convey.
Dark moody photography is a journey into the depths of culinary artistry. The right lighting setup is key to unveiling the dramatic and intimate stories. Whether you’re a professional photographer or a passionate enthusiast, mastering these lighting techniques will elevate your dark moody imagery, captivating your audience with every shot.
Author’s Note: This guide aims to inspire and equip photographers with the knowledge to excel in the enchanting world of dark moody photography, turning every culinary creation into a piece of visual poetry.